With the Selection and Smart Drawing Tool, click the Master Time Bar handle and drag it until the time bar is aligned with the second rising edge of the clk signal. At the top of the window, the Master Time Bar box displays 30.0 ns.
Move the Selection and Smart Drawing Tool pointer in the waveform to the time of 160 ns. At the top of the window, the Pointer box displays 160.0 ns, the time where the pointer is located. Note that the Interval box displays 130.0 ns, the time difference between the Master Time Bar and the Selection and Smart Drawing Tool location.
Right-click in the waveform drawing area and choose Insert Time Bar (right button pop-up menu). The Insert Time Bar dialog box appears.
In the Time box, type 160 and select ns in the list.
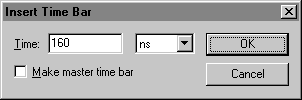
Click OK. A new time bar appears on the waveform at 160.0 ns. The text +130.0 ns is shown above the second time bar, indicating the time difference from the new time bar to the Master Time Bar.
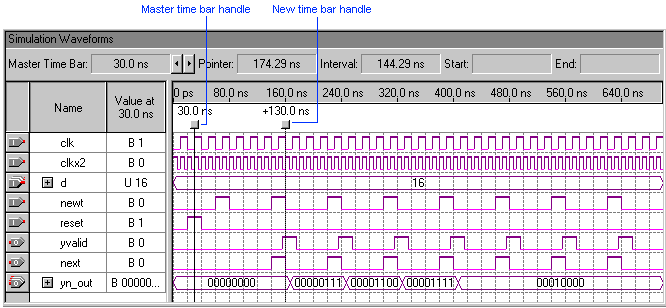
| You can move a time bar by dragging its handle to the desired point in the waveform. All measurement data is updated accordingly. |