Choose Assignment Organizer (Assignments menu). The By Node tab of the Assignment Organizer dialog box appears automatically.
Under Mode, select Edit specific entity and node settings for.
Under Mode, click Browse (...) next to the Name box. The Node Finder dialog box appears.
To find the clock signal name to which you want to assign the clock settings, in the Node Finder dialog box, select Pins: all in the Filter list and then click Start.
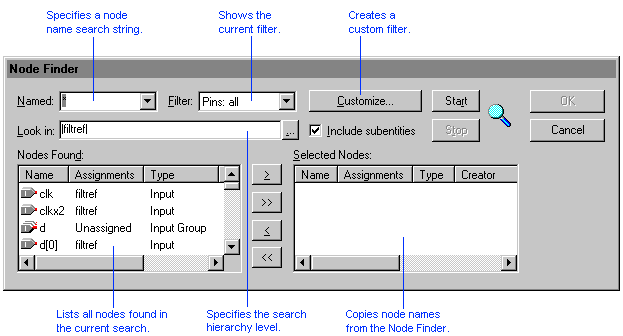
In the Nodes Found list, double-click the clk pin name.
To copy the clk pin name to the Assignment Organizer dialog box and close the Node Finder dialog box, click OK.