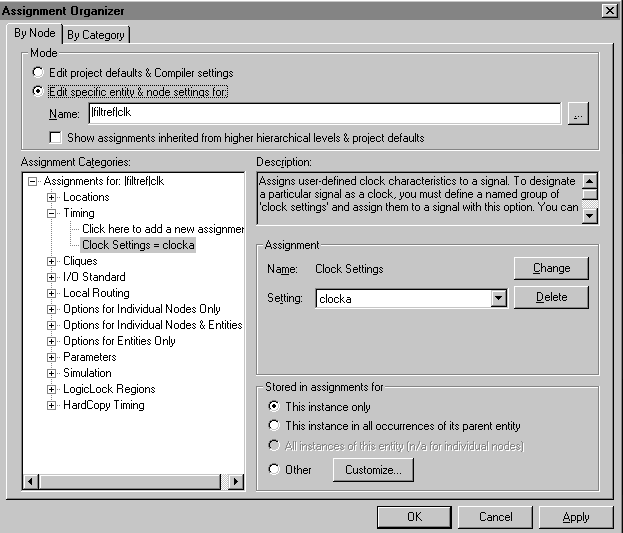
In the Assignment Organizer dialog box, click the + icon to expand Timing in the Assignment Categories list.
Click the Click here to add a new assignment text.
Under Assignment, in the Name list, make sure Clock Settings is selected.
To identify the clock settings that should be assigned to the pin, make sure clocka is selected in the Setting list.
Click Add. The new assignment appears in the Assignment Categories list.

Under Mode, click Browse (...) next to the Name box. The Node Finder dialog box appears.
To remove the clk pin name from the Selected Nodes list, click Remove all nodes (<<).
To find the clkx2 pin to which you want to assign clock settings, in the Node Finder dialog box, click Start.
In the Nodes Found list, double-click the clkx2 pin name.
To copy the clkx2 pin name to the Assignment Organizer dialog box and close the Node Finder dialog box, click OK.
Repeat steps 7 through 11 to assign the clockb settings to the clkx2
pin.
In the Assignment Organizer dialog box, click OK.