In the Project Navigator, click the Hierarchies tab.
| The Project Navigator appears by default when you start the Quartus II software. However, if necessary, you can display the Project Navigator by turning on Utility Windows > Project Navigator (View menu). |
In the Hierarchies tab, click the + icon to expand the filter hierarchy.
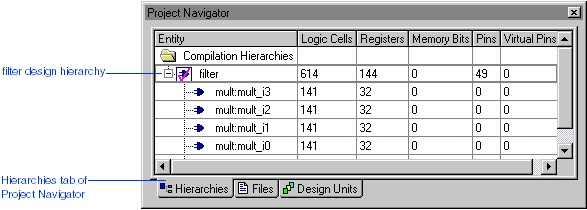
In the Hierarchies tab, select the filter design entity name.
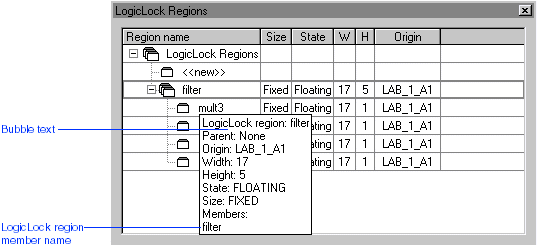
To assign the logic of the filter design entity to the filter LogicLock region, drag the filter entity name onto the filter LogicLock region name in the LogicLock Regions window. The logic of the filter entity is now assigned to the LogicLock region.
In the LogicLock Regions window, move the mouse pointer over filter LogicLock region name. The properties of the region, including the assigned filter entity, appear in a tool tip, indicating that the logic of the filter entity is now assigned to the LogicLock region.
| Drag design entity: | To LogicLock region: |
| mult:mult_i0 | mult0 |
| mult:mult_i1 | mult1 |
| mult:mult_i2 | mult2 |
| mult:mult_i3 | mult3 |