Step 1: Specify the Default Required fMAX

You can specify a default fMAX for an entire project, or you can specify a required fMAX for selected portions of the project.

To specify the default required fMAX, follow these steps:

  1. Choose Timing Settings (Assignments menu). The Timing Settings page of the Settings dialog box appears.

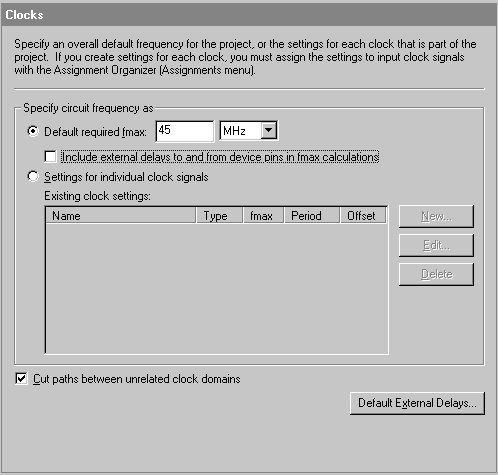
  2. In the Category list, select Clocks under Timing Settings. The Clocks page appears.

  3. Under Specify circuit frequency as, Make sure Default required fmax is selected.

  4. In the Default required fmax box, type 45 and select MHz in the list. The Fitter will now optimize the placement of logic in the device in order to meet this timing goal, and the Timing Analyzer reports any signals that do not acheieve the fMAX requirement during compilation.
  5. Show Me

    Clocks Page (Timing Settings)

NOTE You can override this default required fMAX for individual clocks in your design by creating clock settings and assigning them to individual clock signals in your design. This procedure is described later in this tutorial.


To continue the tutorial, proceed to Step 2: Cut Timing Paths.