Choose New Project Wizard (File menu). The New Project Wizard appears. The first time you open the New Project Wizard, it may display the Introduction page; you can click Next to proceed to the first page of the wizard.
Type the directory name in the working directory box, or select the directory with Browse (...). For this example, type d:\qdesigns\fir_filter or browse to select it.
Type a name for the project in the project name box. For this example, type fir_filter.
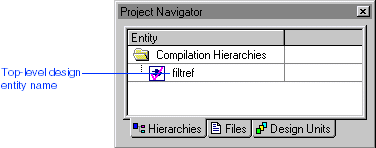
Type filtref as the name of the top-level design entity of the project in the top-level design entity box.
| By default, the project name you enter appears as the name of the top-level design entity. However, you can use a different top-level design entity name, as this step directs you to do. |

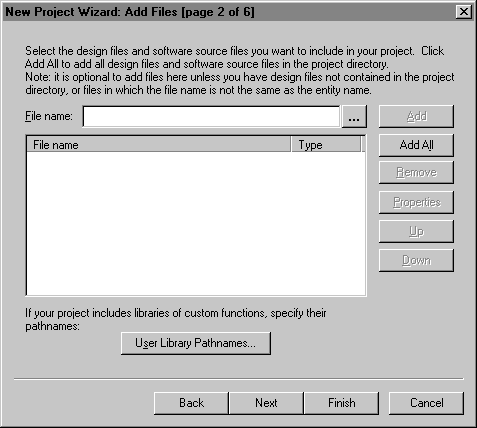
Click Next. The Add Files page of the New Project Wizard appears. Because fir_filter is a new project, there are no files to add to this project yet. If design files already existed for this project, you could use Browse (...) to select the files, and then click Add to add them to the project.
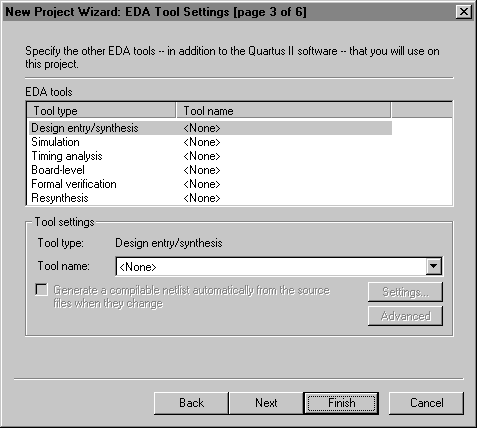
Click Next. The EDA Tool Settings page of the New Project wizard appears. This page allows you to specify options for other EDA tools for use with this project. Since this project does not use other EDA tools, make sure that None is specified in the Tool name column for each tool type.
To accept the default settings for the remaining wizard prompts and create the project, click Finish. The project is now created. The top-level design entity name appears in the Hierarchies tab of the Project Navigator window.