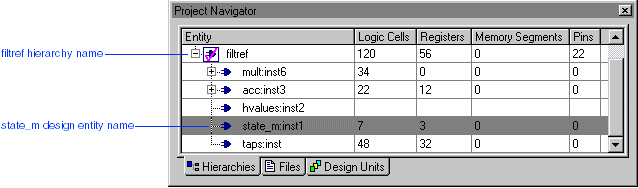
In the Project Navigator, click the Hierarchies tab.
| The Project Navigator appears by default when you start the Quartus II software. However, if necessary, you can display the Project Navigator by turning on Utility Windows > Project Navigator (View menu). |
In the Hierarchies tab, click the + icon to expand the filtref hierarchy.
In the filtref hierarchy, select the state_m:inst1 design entity name.
Choose Assignment Organizer (right button pop-up menu). The Assignment Organizer dialog box appears, with the Edit specific entity & node settings for option selected, and with the hierarchical path name of the state_m:inst1 entity shown in the Name box.
In the Assignment Categories list, click the + icon to expand Options for Entities Only.
Click the Click here to add a new assignment text.
Under Assignment, in the Name list, select Technology Mapper -- APEX 20K/20KE/20KC/APEX II/ARM-based Excalibur.
In the Setting list, select Product Term.
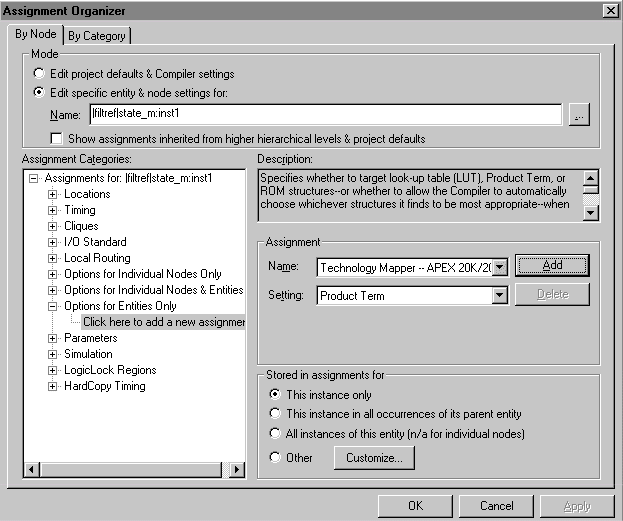
Click Add. The logic option assignment appears in the Assignment Categories list.
Click OK.